OpenBSD

OpenBSD - ansible-pylibssh

wanna build ansible-pylibssh on OpenBSD 7.3 ?

Build failed ?

$ pip install ansible-pylibssh
Defaulting to user installation because normal site-packages is not writeable
Collecting ansible-pylibssh
  Using cached ansible-pylibssh-1.1.0.tar.gz (106 kB)
  Installing build dependencies ... done
  Getting requirements to build wheel ... done
  Installing backend dependencies ... done
  Preparing metadata (pyproject.toml) ... done
Building wheels for collected packages: ansible-pylibssh
  Building wheel for ansible-pylibssh (pyproject.toml) ... error
  error: subprocess-exited-with-error
  
  × Building wheel for ansible-pylibssh (pyproject.toml) did not run successfully.
  │ exit code: 1
  ╰─> [6 lines of output]
      [1/1] Cythonizing /tmp/pip-install-3inpi4en/ansible-pylibssh_04d3883cfd7d49ecb34d03dc90702e66/src/pylibsshext/_libssh_version.pyx
      /tmp/pip-install-3inpi4en/ansible-pylibssh_04d3883cfd7d49ecb34d03dc90702e66/src/pylibsshext/_libssh_version.c:757:10: fatal error: 'libssh/libssh.h' file not found
      #include "libssh/libssh.h"
               ^~~~~~~~~~~~~~~~~
      1 error generated.
      error: command '/usr/bin/cc' failed with exit code 1
      [end of output]
  
  note: This error originates from a subprocess, and is likely not a problem with pip.
  ERROR: Failed building wheel for ansible-pylibssh
Failed to build ansible-pylibssh
ERROR: Could not build wheels for ansible-pylibssh, which is required to install pyproject.toml-based projects

Build sucessfully !

$ CFLAGS=-I/usr/local/include pip install ansible-pylibssh
Defaulting to user installation because normal site-packages is not writeable
Collecting ansible-pylibssh
  Downloading ansible-pylibssh-1.1.0.tar.gz (106 kB)
     ━━━━━━━━━━━━━━━━━━━━━━━━━━━━━━━━━━━━━━━━ 106.2/106.2 kB 687.2 kB/s eta 0:00:00
  Installing build dependencies ... done
  Getting requirements to build wheel ... done
  Installing backend dependencies ... done
  Preparing metadata (pyproject.toml) ... done
Building wheels for collected packages: ansible-pylibssh
  Building wheel for ansible-pylibssh (pyproject.toml) ... done
  Created wheel for ansible-pylibssh: filename=ansible_pylibssh-1.1.0-cp310-cp310-openbsd_7_3_amd64.whl size=651397 sha256=76e37e982c0902f3a846347577ab5dc371ef97ccbea145eb9c2820fad1501d9d
  Stored in directory: /home/stoege/.cache/pip/wheels/60/74/37/a1ba5b525d4f4e67e90e1ae862e66eeedc08147fb09d82b5d8
Successfully built ansible-pylibssh
Installing collected packages: ansible-pylibssh
Successfully installed ansible-pylibssh-1.1.0

Any Comments ?

sha256: 162600846baa1e3d7e35801c67e5c7737aaf2a5dd8cc09952111c626bf942e4c
Python - Redirector

Redirector App

wrote a little redirector app and tought i will explain and share it here. it’s a bit like a url shortener, but you can define the “shortcut” of the URL.

how does it work

it basically consists of a Text File wir Redirection URL’s.

redi.txt

stoege,https://www.stoege.net
blog,https://blog.stoege.net
test,https://www.test.com

Call it

so, when you open a Browser and Request the URL: https://your.domain.de/blog, you get redirected to https://blog.stoege.net

main.app

from flask import Flask, redirect, request
import datetime
import os
import random

# Vars
redirect_file="redi.txt"

app = Flask(__name__)

# Load redirection data from a text file
def get_redirections():
    redirections = {}
    with open(redirect_file,"r") as file:
        for line in file:
            path, url = line.strip().split(',')
            redirections[path] = url
    return redirections

# Main
@app.route('/')
def index():
    return 'Hello, World!'

# Redirect to Random URL
@app.route('/random')
def random_path():
    redirections = get_redirections()

    # Get Random Path
    random_url = random.choice(list(redirections.values()))
    return redirect(random_url)

# Redirect
@app.route('/<path:path>')
def redirect_path(path):

    # File Changed ?
    redirections = get_redirections()

    # Check if the path exists in the redirections dictionary
    if path in redirections:

        url = redirections[path]
        return redirect(url)

    # If the path does not exist, return a 404 Not Found error
    return 'Not Found', 404

if __name__ == '__main__':
    app.run()

get it running

you need the ususal Stuff

HTMX & Nginx

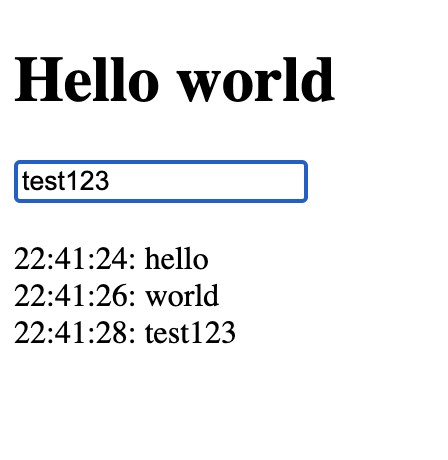
Little Test with HTMX & Nginx

recently, i saw the Keynote - “Full-Stack Python” (Andy “Pandy” Knight) and i read an article about html & websockets. So I thought why not give it a try?

Preview

Requirements

the usual stuff:

  • Virtual Machine (here: OpenBSD VM)
  • FQDN Pointing to your Box
  • SSL Cert

Webroot

on your webserver, create a new webroot wherever you have your pages located.

su - webmaster
mkdir -p /var/www/virtual/your.page.de
cd /var/www/virtual/your.page.de/

main.py

the main part of the python code …

OpenBSD - Smokeping

How to Install Smokeping on OpenBSD

Requiremens

  • running Server with OpenBSD
  • Root Permission
  • FQDN with Cert

Install Software

pkg_add smokeping

Update Config

cat << 'EOF' >/etc/smokeping/config
*** General ***

owner    = YOUR NAME
contact  = YOUR@EMAIL.NET
mailhost = localhost
sendmail = /usr/sbin/sendmail
# NOTE: do not put the Image Cache below cgi-bin
# since all files under cgi-bin will be executed ... this is not
# good for images.
imgcache = /var/www/htdocs/smokeping/cache
imgurl   = cache
datadir  = /var/db/smokeping
piddir  = /var/run
cgiurl   = https://YOUR.URL.NET/smokeping/smokeping.cgi
smokemail = /etc/smokeping/smokemail
tmail = /etc/smokeping/tmail
# specify this to get syslog logging
syslogfacility = local0
# each probe is now run in its own process
# disable this to revert to the old behaviour
# concurrentprobes = no

*** Alerts ***
to = YOUR@EMAIL.NET
from = smokealert@localhost

+someloss
type = loss
# in percent
pattern = >0%,*12*,>0%,*12*,>0%
comment = loss 3 times  in a row

*** Database ***

step     = 300
pings    = 20

# consfn mrhb steps total

AVERAGE  0.5   1  28800
AVERAGE  0.5  12   9600
    MIN  0.5  12   9600
    MAX  0.5  12   9600
AVERAGE  0.5 144   2400
    MAX  0.5 144   2400
    MIN  0.5 144   2400

*** Presentation ***

template = /etc/smokeping/basepage.html

htmltitle = yes
graphborders = no

+ charts

menu = Charts
title = The most interesting destinations

++ stddev
sorter = StdDev(entries=>4)
title = Top Standard Deviation
menu = Std Deviation
format = Standard Deviation %f

++ max
sorter = Max(entries=>5)
title = Top Max Roundtrip Time
menu = by Max
format = Max Roundtrip Time %f seconds

++ loss
sorter = Loss(entries=>5)
title = Top Packet Loss
menu = Loss
format = Packets Lost %f

++ median
sorter = Median(entries=>5)
title = Top Median Roundtrip Time
menu = by Median
format = Median RTT %f seconds

+ overview 

width = 600
height = 50
range = 10h

+ detail

width = 600
height = 200
unison_tolerance = 2

"Last 3 Hours"    3h
"Last 30 Hours"   30h
"Last 10 Days"    10d
"Last 360 Days"   360d

#+ hierarchies
#++ owner
#title = Host Owner
#++ location
#title = Location

*** Probes ***

+ FPing

binary = /usr/local/sbin/fping

*** Targets ***

probe = FPing

menu = Top
title = Network Latency Grapher
remark = Welcome to the SmokePing

+ Remote
menu= Remote
title= Remote hosts

+ DNS
menu = DNS
title = DNS

++ cf
menu = 1.1.1.1
title = 1.1.1.1
host = 1.1.1.1

++ google
menu = 8.8.8.8
title = 8.8.8.8
host = 8.8.8.8

++ quad9
menu = 9.9.9.9
title = 9.9.9.9
host = 9.9.9.9
EOF

Create Folders

don’t like to set permission to 777. but it does not work without :(

Anycast IPv6 - YourSelf

How to Build your own AnyCast Network

you’re using anycast every day. all public resolvers (1.1.1.1, 8.8.8.8, 9.9.9.9) for example are anycast ip’s and hence, many servers distributed around the world which listen and announce the same ip address.

we can build a proof of concept, how to build such a network, for a few $.

Requirements

AS Number

Anycast heavily depends on BGP. So, you need a own AS Number. I got my for 15 CHF/Year from Securebit.ch. You should also keep in mind that you will not get any IPv4 addresses without buying them for the market. So, your Setup will be based on IPv6 only.

OpenBSD - HTTPD CGI

Let’s have a look a the old and simple “cgi-bin” stuff on OpenBSD. The Webserver is written by the OpenBSD Guys, and it runs in a chrooted environment.

switch to cgi-bin dir

cd /var/www/cgi-bin/

ip.cgi

create the file under /var/www/cgi-bin called ‘ip.cgi’

cat << 'EOG' > ip.cgi
#!/bin/sh
cat << EOF
Content-type: text/html

<html><head>
<title>IP: $REMOTE_ADDR</title>
</head><body>
<p>Your IP address is: $REMOTE_ADDR</p>
</body></html>
EOF
EOG

Set Owner & Permission

chmod 500 ip.cgi
chown www ip.cgi

as we have the command “cat” in the Script, we need to have this binary in the chrooted HTTP of OpenBSD as well.

OpenBSD - PHP 8.2

Running PHP on OpenBSD

yes, i know … it’s not rocket science .. but why not make a short post so other (or myself) can have a quick look if needed ?

pkg_info -Q php
pkg_add php--%8.2
pkg_add php-sqlite3--%8.2
pkg_add php-curl--%8.2

Set TimeZone

and allow short open tags

sed -i s'#date.timezone = UTC.*#date.timezone = Europe/Zurich#'  /etc/php-8.2.ini
sed -i s'#short_open_tag = Off.*#short_open_tag = On#'  /etc/php-8.2.ini

Install all Modules

if needed .. does not make sense for me :(

OpenBSD 7.3

OpenBSD 7.3 finally released.

Today, the 54th Release of OpenBSD was announced. The Upgrade Script is available here …

one cool thing to mention:

  • Added initial support in the installer for guided disk encryption for amd64, i386, riscv64 and sparc64.

Script

as root

cd /root
ftp https://blog.stoege.net/scripts/.helpers
ftp https://blog.stoege.net/scripts/upgrade_to_73.sh
chmod u+x upgrade_to_73.sh

Execute

./upgrade_to_73.sh

Any Comments ?

sha256: 000c2b0afa4739a87a7e921ec1fcfa4fb9113effd47e2f2456dfb2b66f65a34f

OpenBSD 7.3 - Diskusage

New Proposal for 7.3

there is an request for at least 1.1GB free Storage at the /usr Partition when upgrading your systeme with sysupgrade. so, i have to adapt my settings a bit for new vm’s with at least 25GB Storage.

Example with 20GB

a 4G  /
a 1G  swap
a 1G  /tmp
a 4G  /var
a 6G  /usr
a *   /home (ca. 4 GB)

Example with 25GB (Vultr)

a 4G  /
a 2G  swap
a 2G  /tmp
a 6G  /var
a 6G  /usr
a *   /home (ca. 5 GB)

which results in:

root@puffy# df -h
Filesystem     Size    Used   Avail Capacity  Mounted on
/dev/sd0a      3.9G   55.8M    3.6G     2%    /
/dev/sd0g      4.8G    2.0K    4.6G     1%    /home
/dev/sd0d      1.9G   10.0K    1.8G     1%    /tmp
/dev/sd0f      5.8G    1.4G    4.1G    26%    /usr
/dev/sd0e      5.8G    7.7M    5.5G     1%    /var

Example with 32GB

a 4G  /
a 1G  swap
a 2G  /tmp
a 8G  /var
a 8G  /usr
a *   /home (ca. 9 GB)

which results in:

root@puffy# df -h
Filesystem     Size    Used   Avail Capacity  Mounted on
/dev/sd0a      3.9G    876M    2.8G    24%    /
/dev/sd0g      8.7G    119M    8.1G     2%    /home
/dev/sd0d      1.9G    108K    1.8G     1%    /tmp
/dev/sd0f      7.8G    2.6G    4.8G    35%    /usr
/dev/sd0e      7.8G   19.6M    7.3G     1%    /var

Example with 40GB (Hetzner)

a 4G  /
a 2G  swap
a 2G  /tmp
a 16G /var
a 8G  /usr
a 8G  /home (ca. 8 GB)

which results in:

root@puffy# df -h

Example with 80GB (Hetzner)

a 4G  /
a 4G  swap
a 4G  /tmp
a 16G /var
a 16G /usr
a 16G /home
a *   /data (ca. 16 GB)

which results in:

root@template74 # df -h
Filesystem     Size    Used   Avail Capacity  Mounted on
/dev/sd0a      3.9G    220M    3.5G     6%    /
/dev/sd0h     15.5G    2.0K   14.7G     1%    /data
/dev/sd0g     15.5G   14.0K   14.7G     1%    /home
/dev/sd0d      3.9G   14.0K    3.7G     1%    /tmp
/dev/sd0f     15.5G    2.0G   12.7G    14%    /usr
/dev/sd0e     15.5G   10.6M   14.7G     1%    /var

Any Comments ?

sha256: 98fa116cf8d4782253fc3da12042383893d396b1ad8d8c146a9e3dfd6c20e7d9

OpenBSD - Terraform

Terraform OpenBSD & Vultr

doas pkg_add git gmake go terraform

cat << EOF

# Go, $(date)
export PATH=$PATH:$(go env GOPATH)/bin
export GOPATH=$(go env GOPATH)
EOF

mkdir -p $GOPATH/src/github.com/vultr; cd $GOPATH/src/github.com/vultr
git clone git@github.com:vultr/terraform-provider-vultr.git

cd $GOPATH/src/github.com/vultr/terraform-provider-vultr
gmake build

main.tf

cat << 'EOF' > main.tf
terraform {
  required_providers {
    vultr = {
      source = "vultr/vultr"
      version = "2.12.1"
    }
  }
}

resource "vultr_instance" "web" {
  count = 2
  plan  = "vc2-1c-1gb"
  region = "fra"
  hostname = "web-${count.index+1}"
  label = "web-${count.index+1}"
}
EOF

Init, Plan, Apply

export TF_VULTR_API_KEY=xxxxxxxxxxxxxxxxxxxxxxxxxxxxxxxxxxxx

terraform init
terraform plan
terraform apply

main.tf

5 Servers in 5 Regions, each of them has got a uniqe name and the authorized_key file adjusted …