Blog

sha256: 2b87a252a3d912530dd8c20df6bee7f6cbc4ede0074fdf217e318aab39d9736c

Slides - SSH Agent

made a few Slides about SSH Agent & Agent Forwarding with https://slides.com. Do you like it ? I do …


Any Comments ?

sha256: dd15fd6475246beedee7f6c61924134c76248cf5e28d7092283475c97e9f2f50

Softraid on OpenBSD

Softraid

Inspired by a book from MWL - OpenBSD Mastery Filesystems, here some Notes ..

Target

build a RAID with 3 Disks, add some Data, destroy one Disk, and rebuild the Raid (and it’s Data).

Requirements

  • OpenBSD 7.2 Running
  • added 3 Disk with 20G each: sd0, sd1, sd2

Find Disks

root@puffy # dmesg |grep -i sec

wd0: 64-sector PIO, LBA, 20480MB, 41943040 sectors
sd0: 20480MB, 512 bytes/sector, 41943040 sectors
sd1: 20480MB, 512 bytes/sector, 41943040 sectors
sd2: 20480MB, 512 bytes/sector, 41943040 sectors

sd0, sd1, sd2 are New Disks for RAID

Dotnet - Hello World

Running a WebApp in 5min ?

ASP.NET Tutorial - Hello World in 5 minutes

in a Language you never touched before … ? a Microsoft App running on Linux running in Docker running on macOS … ?

Let’ give a try …

Fireup Ubuntu via Docker, do Port Forward

docker run -it -p 5123:5123 --name dotnet-hello ubuntu:latest

add basics

apt-get update && apt-get -y upgrade && apt-get -y install wget

add dotnet

wget https://packages.microsoft.com/config/ubuntu/22.10/packages-microsoft-prod.deb -O packages-microsoft-prod.deb
dpkg -i packages-microsoft-prod.deb && rm packages-microsoft-prod.deb
apt-get update && apt-get install -y dotnet-sdk-7.0
dotnet --version

build webapp

dotnet new webapp -o MyWebApp --no-https -f net7.0

run webapp, change IP & Port

cd MyWebApp
sed -i 's#"applicationUrl".*#"applicationUrl": "http://0.0.0.0:5123",#' Properties/launchSettings.json
dotnet watch

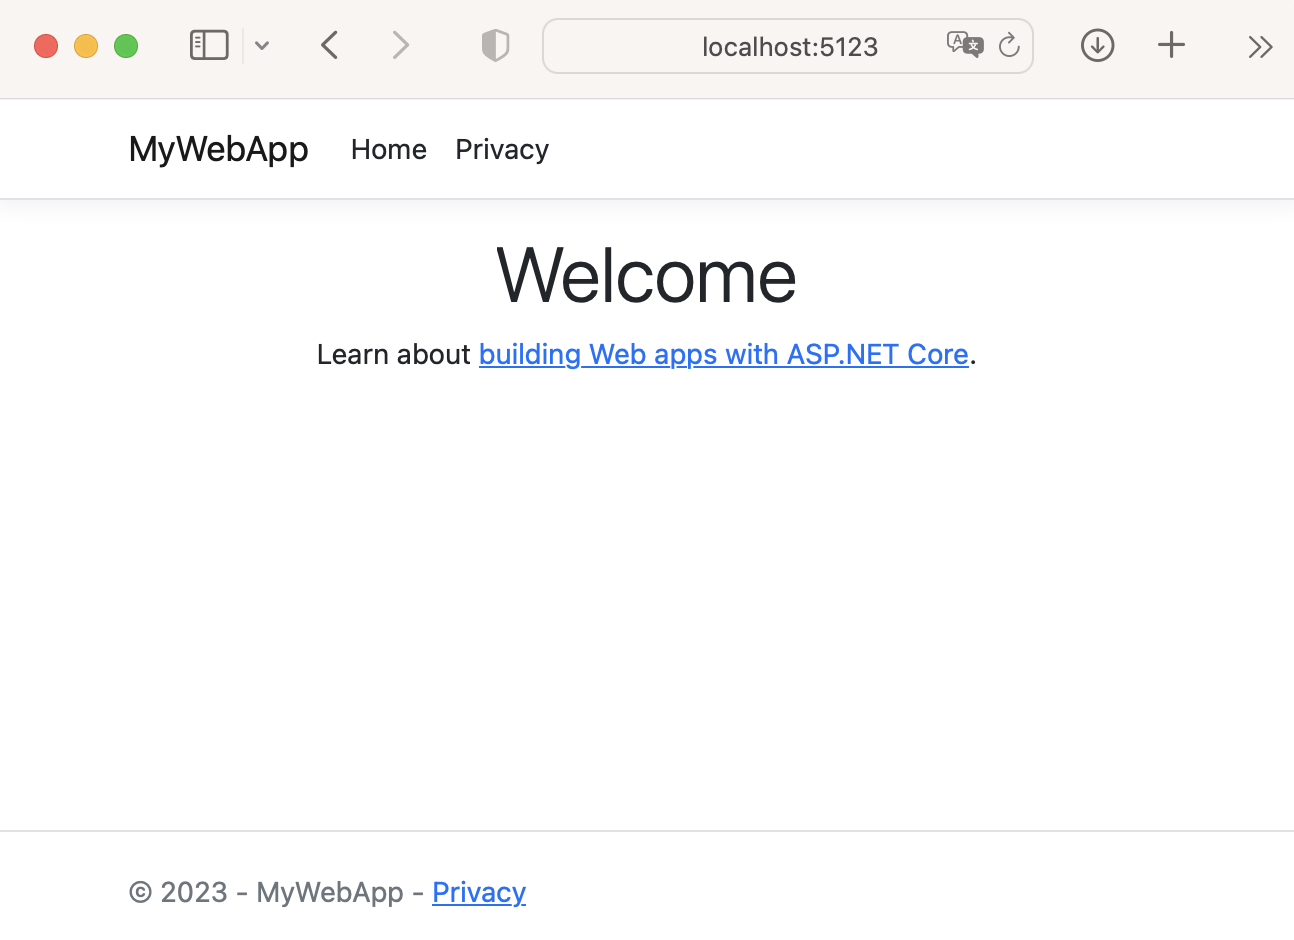
Hello World

Errors

Misc Errors and Solutions

Flask & sqlalchemy

(flask-tables-py3.10) user@host ../flask-tables> python create_fake_users.py 5
Traceback (most recent call last):
  File "/Users/stoege/git/mpr_2023Q1/flask-tables/create_fake_users.py", line 6, in <module>
    from bootstrap_table import User, db
  File "/Users/stoege/git/mpr_2023Q1/flask-tables/bootstrap_table.py", line 18, in <module>
    db.create_all()
  File "/Users/stoege/git/mpr_2023Q1/flask-tables/.venv/lib/python3.10/site-packages/flask_sqlalchemy/extension.py", line 868, in create_all
    self._call_for_binds(bind_key, "create_all")
  File "/Users/stoege/git/mpr_2023Q1/flask-tables/.venv/lib/python3.10/site-packages/flask_sqlalchemy/extension.py", line 839, in _call_for_binds
    engine = self.engines[key]
  File "/Users/stoege/git/mpr_2023Q1/flask-tables/.venv/lib/python3.10/site-packages/flask_sqlalchemy/extension.py", line 628, in engines
    app = current_app._get_current_object()  # type: ignore[attr-defined]
  File "/Users/stoege/git/mpr_2023Q1/flask-tables/.venv/lib/python3.10/site-packages/werkzeug/local.py", line 513, in _get_current_object
    raise RuntimeError(unbound_message) from None
RuntimeError: Working outside of application context.

This typically means that you attempted to use functionality that needed
the current application. To solve this, set up an application context
with app.app_context(). See the documentation for more information.

Solution

Bash - Snippets

some Bash snippets

Change Working Directory

Switch the Working Directory to the Base Path where the Scripts remains. Helpfull for Includes, Log Files, Relative Path and so on …

#!/usr/bin/env bash
script_path=$(dirname "$0")
cd "$script_path"

Check Return Code

Run a Command, store the Return Code, and check if it was successfull or failed

#!/usr/bin/env sh

check_ret () {
  if [[ "$ret" == "0" ]]; then
    echo "Command terminated sucessfully"
  else
    echo "Command returned an Error: ${ret}"
  fi
}

which bash > /dev/null 2>&1
ret=$?
check_ret $ret


which BASH > /dev/null 2>&1
ret=$?
check_ret $ret

exit 0

Source or Execute

You can Source a Script or Execute it. On Different Shells and on different Operation Systems.

SSH Key Generator

If you need multiple SSH keys with passphrases for educational purposes, you can generate them as follows. The passphrase is set in the comments of the corresponding public key.

SSH Key Generator Script

cat << 'EOF' > /tmp/ssh-key-generator.sh
#!/usr/bin/env bash

# File
f=/tmp/id_ed25519

# Cleanup
test -f $f && rm $f $f.pub

# Gen Key
ssh-keygen -o -a 100 -t ed25519 -N "" -f ${f}

# Extact Password (last 8 Char from PubKey)
pw=$(cat ${f}.pub |cut -d" " -f 2 |gsed -E 's/^.{60}//')
pw2=$(echo $pw |gsed -E 's/\//x/g')
id=$(echo $pw2 |gsed -E 's/^....//')

# Rename
mv ${f}     ${f}-${id}
mv ${f}.pub ${f}-${id}.pub

# Set Var
x="${f}-${id}"
f="$x"

# Prepare Password
cat << EOF2 > ${f}.x
#!/bin/sh
echo $pw2
EOF2
chmod +x ${f}.x

# Set Comment
ssh-keygen -c -C "Password: $pw2" -f ${f}

# Set Password
ssh-keygen -p -N "$pw2" -f ${f}

# Show Key
cat ${f}.pub

# Add to Agent
DISPLAY=1 SSH_ASKPASS="${f}.x" ssh-add ${f} < /dev/null

# Cleanup
rm ${f}.x

exit 0
EOF

set Permission and run it

cd /tmp
chmod +x /tmp/ssh-key-generator.sh
./ssh-key-generator.sh; ls -la /tmp/id*

a few test runs

user@host /tmp$ ./ssh-key-generator.sh; ls -la id_ed25519-* 
Generating public/private ed25519 key pair.
Your identification has been saved in /tmp/id_ed25519
Your public key has been saved in /tmp/id_ed25519.pub
The key fingerprint is:
SHA256:IdJGeVPDOMrk9BidtIKrIzFBn8vNgjHVT8/sdSA9hik user@host
The key's randomart image is:
+--[ED25519 256]--+
| . .. .+.=*      |
|. o .==EB=.*     |
|.o oo=B*Boo o    |
| .= ++=+.= . .   |
|o. +.o  S . .    |
| o ..    .       |
|. o              |
| . .             |
|                 |
+----[SHA256]-----+
Old comment: user@host
Comment 'Password: S4seK144' applied
Key has comment 'Password: S4seK144'
Your identification has been saved with the new passphrase.
ssh-ed25519 AAAAC3NzaC1lZDI1NTE5AAAAIMKxvcjpd8DvAfdO0nZ34uCxalQHgN0XUSRxS4seK144 Password: S4seK144
Identity added: /tmp/id_ed25519-K144 (Password: S4seK144)
-rw-------  1 user  wheel  464 Jan 25 22:36 id_ed25519-Bhxt
-rw-r--r--  1 user  wheel  100 Jan 25 22:36 id_ed25519-Bhxt.pub
-rw-------  1 user  wheel  464 Jan 25 22:30 id_ed25519-GCow
-rw-r--r--  1 user  wheel  100 Jan 25 22:30 id_ed25519-GCow.pub
-rw-------  1 user  wheel  464 Jan 25 22:36 id_ed25519-K144
-rw-r--r--  1 user  wheel  100 Jan 25 22:36 id_ed25519-K144.pub

Any Comments ?

sha256: 541867de7da5d482614e872eaf47c51578347c8ff3c2df980914795eb4515f61

Vault on OpenBSD

how to Install and run Hashicorp Vault on OpenBSD

in addition to [https://blog.stoege.net/categories/vault/](this Blog Entry), here some instructions for OpenBSD.

Requirements

  • VM with OpenBSD 7.2 (or older …) and root/doas permission
  • Domain, or at least a FQDN Name pointing to your VM
  • HTTP/HTTPS allowed from Internet (for Certificate Generation)
  • Nginx installed (pkg_add nginx)

Source

https://developer.hashicorp.com/vault/docs/get-started/developer-qs

Install Vault

all the Steps must be run as root (or with doas)

pkg_add vault

Vault Config

Backup the prev. Config before …

Python - Little Wordcloud

Do you like Word Clouds ?

I do …!

following a litte Script which Parse a Website and build a appropriate Word Cloud

Script

mkdir ~/mywordcloud; cd ~/mywordcloud

cat <<'EOF' > main.py
import fire
import matplotlib.pyplot as plt
import pandas as pd
import re
import requests
from bs4 import BeautifulSoup
from wordcloud import STOPWORDS, WordCloud


def gen_cloud_tag(url: str = "https://blog.stoege.net"):
    # add https
    if not url.startswith("https://"):
        url = "https://" + url

    # get Webpage
    response = requests.get(url, timeout=5, allow_redirects=True)
    soup = BeautifulSoup(response.text, "html.parser")
    words = soup.get_text()

    # split with multiple delimiters
    words = re.split(r"[\n\r]", words)

    # build Dataframe
    df = pd.DataFrame(words)

    # Stop Words
    comment_words = ""
    stopwords = set(STOPWORDS)

    # iterate
    for val in df.values:
        # typecaste each val to string
        val = str(val)

        # split the value
        tokens = val.split()

        # Converts each token into lowercase
        for i in range(len(tokens)):
            tokens[i] = tokens[i].lower()

        comment_words += " ".join(tokens) + " "

    # Build Wordcloud
    wordcloud = WordCloud(
        width=800,
        height=800,
        background_color="white",
        stopwords=stopwords,
        min_font_size=10,
    ).generate(comment_words)

    # Build Image
    plt.figure(figsize=(8, 8), facecolor=None)
    plt.imshow(wordcloud)
    plt.axis("off")
    plt.tight_layout(pad=0)

    # show Image
    plt.show()


if __name__ == "__main__":
    fire.Fire(gen_cloud_tag)
EOF

Init Project

you need a few python libraries. use some virtual env like venv, poetry or whatever your want

Yubikey - on OpenBSD

Running YubiKey on OpenBSD

buy a Key and give try …

Source

https://www.yubico.com/

Install Software

pkg_add yubikey-manager-3.1.2p4
quirks-6.42 signed on 2023-01-08T01:39:04Z
yubikey-manager-3.1.2p4:py3-click-7.1.2: ok
yubikey-manager-3.1.2p4:py3-pyusb-1.0.2p5: ok
yubikey-manager-3.1.2p4:pcsc-lite-1.9.8: ok
yubikey-manager-3.1.2p4:py3-cparser-2.19p2: ok
yubikey-manager-3.1.2p4:py3-cffi-1.15.1: ok
yubikey-manager-3.1.2p4:py3-cryptography-38.0.0p0: ok
yubikey-manager-3.1.2p4:py3-pyscard-2.0.3: ok
yubikey-manager-3.1.2p4:py3-openssl-22.0.0: ok
yubikey-manager-3.1.2p4:libyubikey-1.13p4: ok
yubikey-manager-3.1.2p4:json-c-0.16: ok
yubikey-manager-3.1.2p4:ykpers-1.20.0p2: ok
yubikey-manager-3.1.2p4: ok
The following new rcscripts were installed: /etc/rc.d/pcscd
See rcctl(8) for details.
--- +yubikey-manager-3.1.2p4 -------------------
NOTE: yubikey-manager (ykman) is only partially functional on OpenBSD.
Most of the "ykman fido xxx" commands (pin-setting and others) stall.

PC/SC Smart Card Daemon

rcctl enable pcscd
rcctl start pcscd

Attack Key

you have to Attack your Yubikey via USB Port … … and ask dmesg about the latest news ;)

Flask JWT - Sample

Flask & JWT

getting your hands dirty with Flask and JWT

Source

with some modifications by myself …

Environment

Test under macOS & OpenBSD, Poetry installed and working

Script

build virtual env

export app="app100"
export FLASK_APP="${app}/app"
poetry new ${app}
cd ${app}

set python 3.10

poetry env use $(which python3.10)
gsed -i "s/python = \"^3.*$/python = \"^3.10\"/" pyproject.toml
poetry lock

add packages

wget -4 -O requirements.txt https://raw.githubusercontent.com/GrahamMorbyDev/jwt-flask/master/requirements.txt
echo "marshmallow-sqlalchemy" >> requirements.txt
poetry add $(awk -F '==' '!/sha256/{print $1}' requirements.txt |tr '\n' ' ')
wget -4 -O ${app}/app.py https://raw.githubusercontent.com/GrahamMorbyDev/jwt-flask/master/app.py
poetry shell

create db